Beginner's guide
Velvet Visualizer, step by step: your first 5 minutes
No lighting-console knowledge needed. By the end of this page you will have a stage on your screen, your lights playing in 3D, and you will know how to plug in your own lighting software.
0Get it running
- Download the free trial (a .zip file). It works on a Mac with macOS 14 or newer.
- Double-click the .zip to unzip it, then drag Velvet Visualizer into your Applications folder.
- Open it. You get 30 days to try everything, no account, no card.
1Pick a starting point
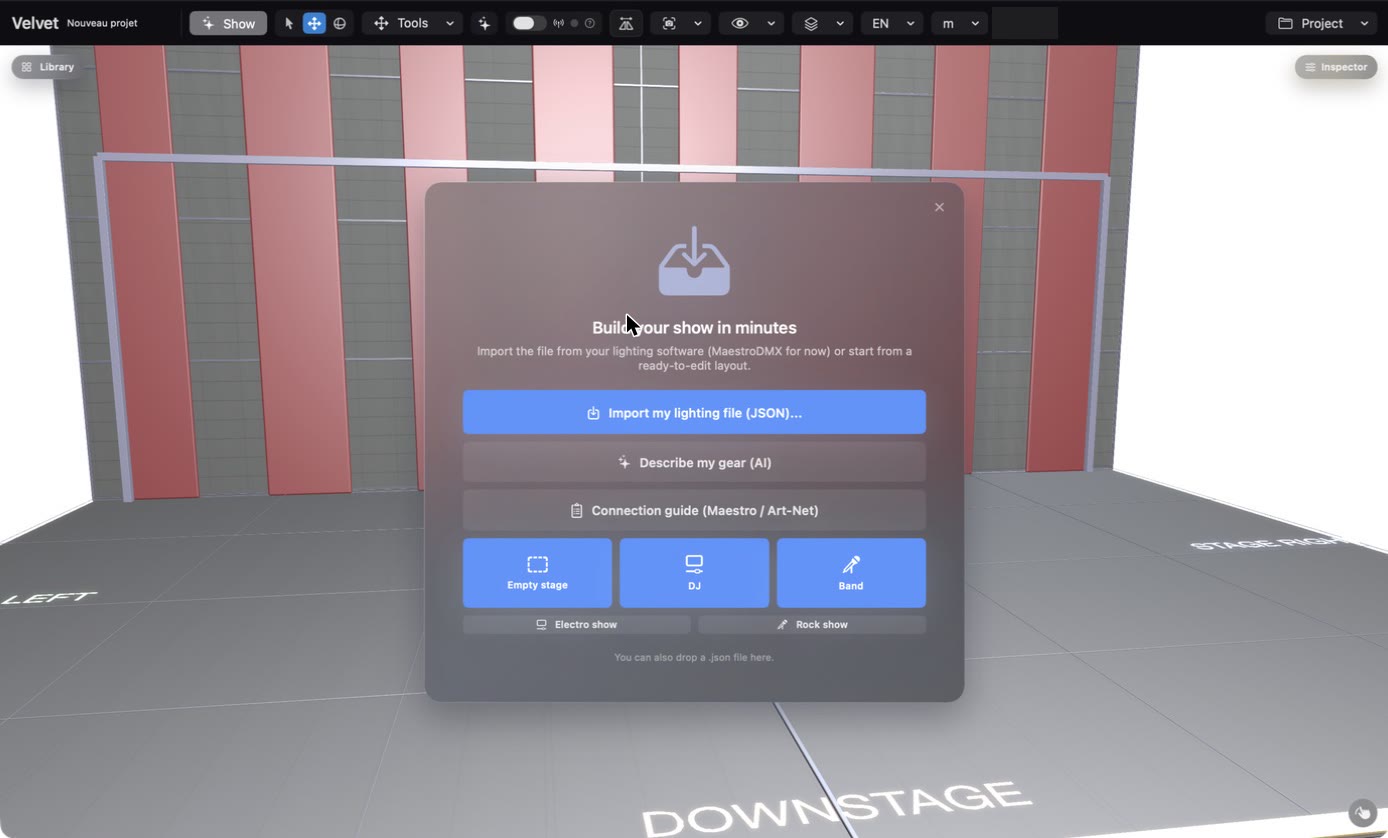
The first time you open the app, a welcome card asks how you want to start. The simplest choice is DJ: a ready-made stage with a DJ booth and a few lights.
2Look at your stage
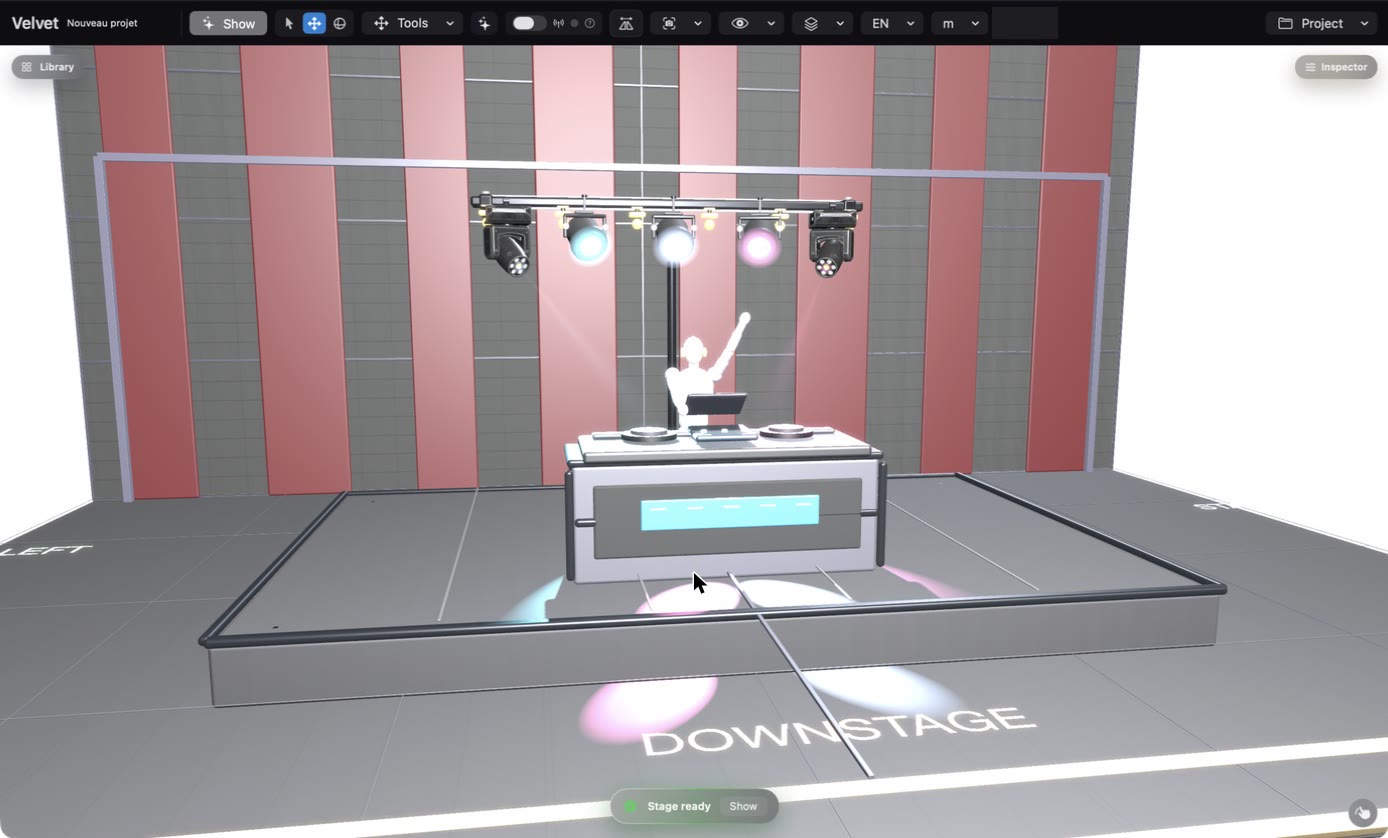
Your stage appears with its lights. Click and drag a light to move it. The panel at the bottom says Stage ready when everything is in place.
3Switch the lights on: Show mode
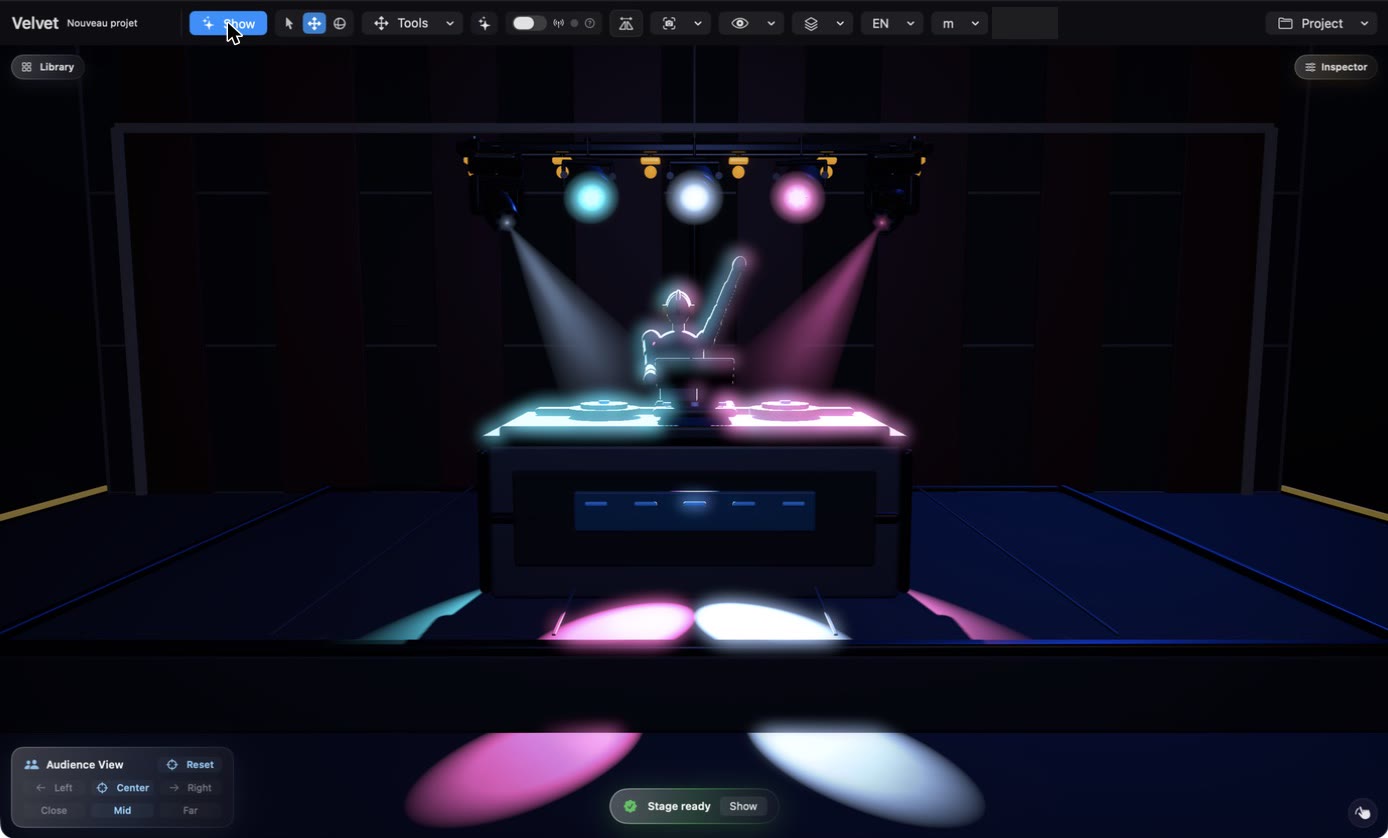
Click Show at the top left. The room goes dark so you can see the beams, like at a real gig. A small Audience View panel lets you look from the left, the centre or the right. Click Show again to come back.
4Add your own lights
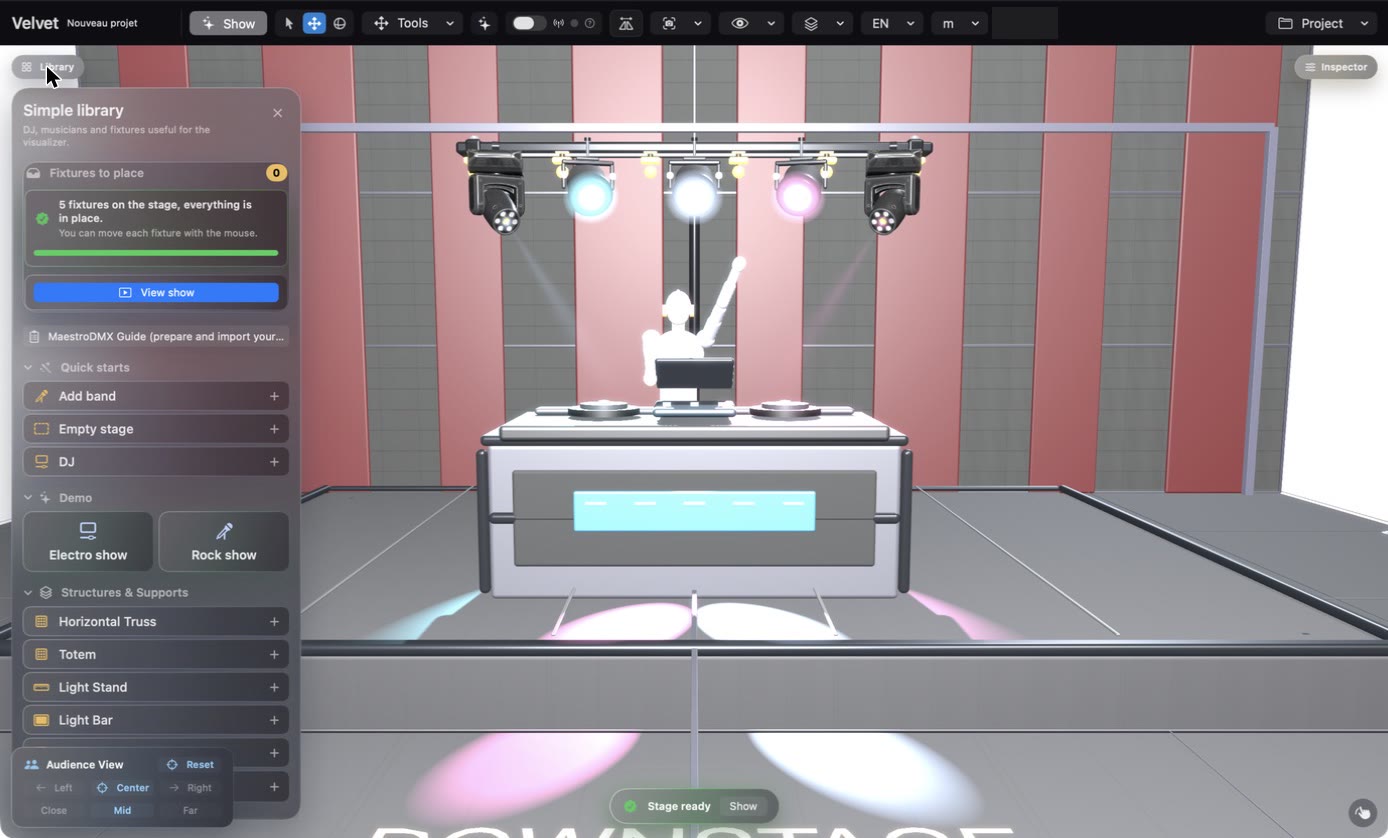
Click Library (top left). Type the name of your fixture in the search box under Real fixtures. Not found? Click Search online: thousands of models are available. Still nothing? Create… lets you describe it yourself.
5Connect your lighting software
This is the step that makes the stage react to your show. Click the small ? next to the Live DMX switch: the Art-Net Setup Assistant opens.
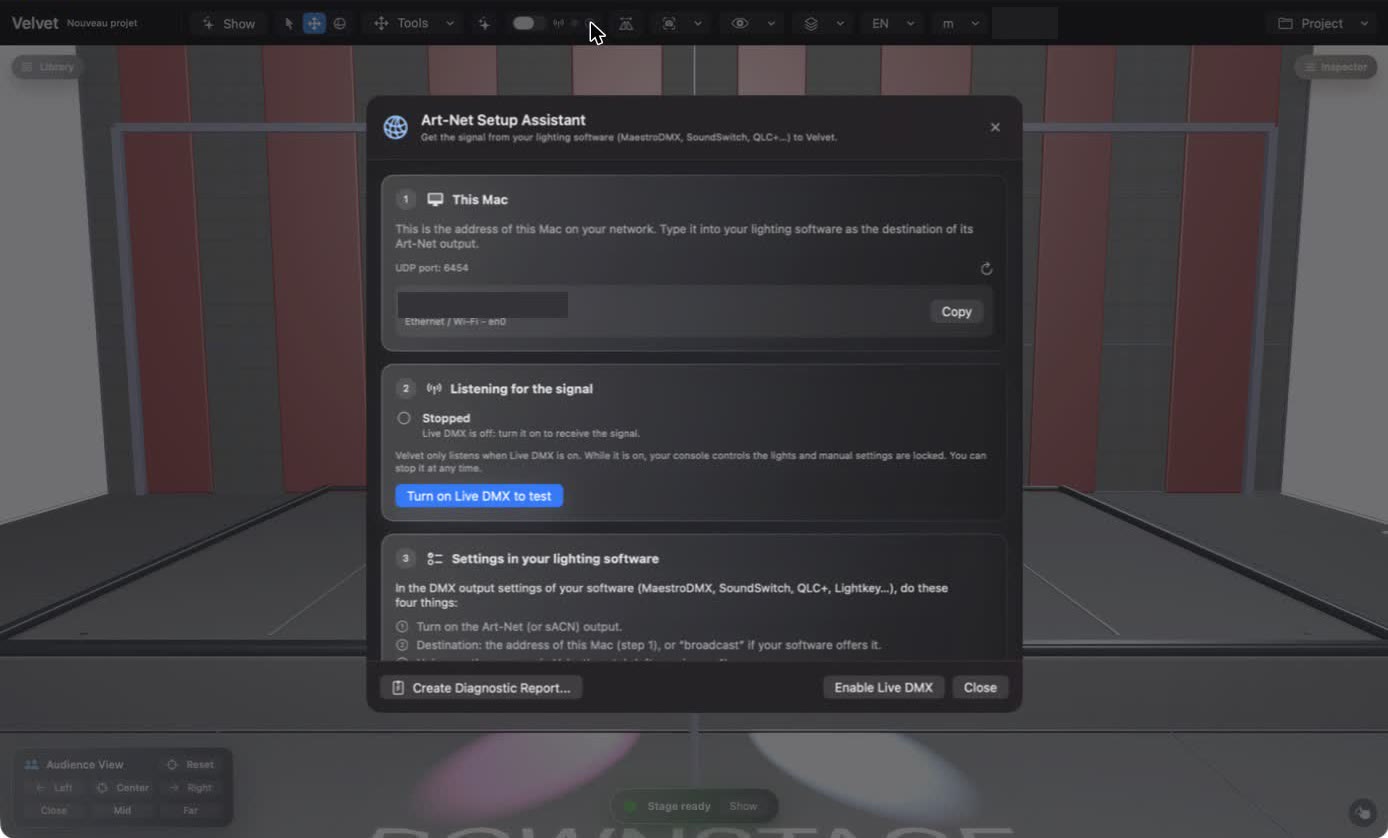
- Copy the address shown in step 1.
- In your lighting software (MaestroDMX, SoundSwitch, QLC+…), turn on the Art-Net output and paste that address as the destination.
- Back in Velvet Visualizer, click Turn on Live DMX to test. Play a light in your software: each step in the assistant turns green when the signal arrives.
Save and share
Use the Project menu (top right) to save your stage or to export a PDF plan for your technician or your client.
Stuck?
Everything is explained in the full user guide. You can also write to me directly: I'm a solo developer and I read everything.